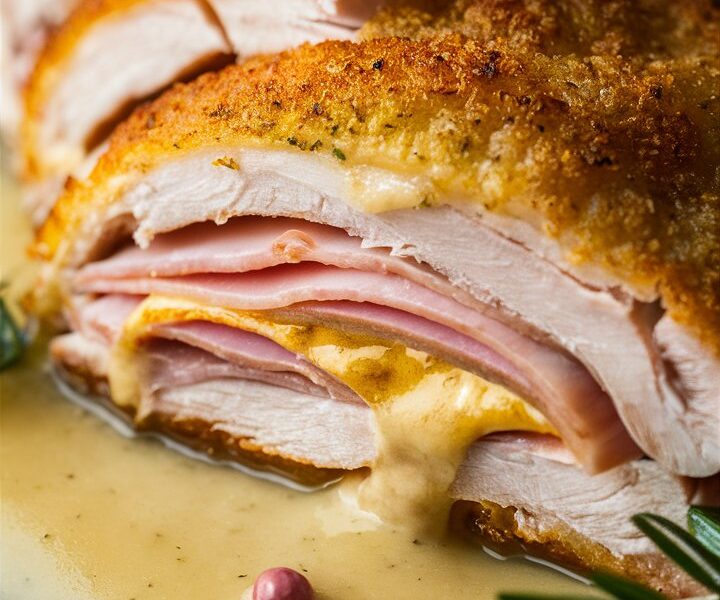
There are recipes that feel comforting, and then there are recipes that feel truly luxurious. Chicken Kiev is one of those dishes that manages to be both. The first time you slice into it, golden breadcrumbs crackle under your knife, revealing a flood of melted garlic butter that soaks into tender chicken. It’s simple, yet deeply satisfying—a dish that has won hearts in kitchens and restaurants around the world.
But what makes Chicken Kiev so iconic? It’s the perfect balance of crispy coating, juicy chicken, and aromatic garlic butter sealed inside. At first glance, it may look complicated, but once you learn the steps, you’ll realize it’s a recipe anyone can master. In this complete guide, you’ll not only discover how to make the perfect Chicken Kiev, but also explore its history, variations, serving ideas, and practical tips to ensure success every single time.
The Story Behind Chicken Kiev
Chicken Kiev has a long and debated history. Some culinary experts trace it back to 19th-century French cuisine, when Russian aristocrats admired French chefs and brought their recipes home. Others believe it originated in Ukraine and was popularized in Moscow before spreading internationally. Regardless of its birthplace, Chicken Kiev gained worldwide recognition in the mid-20th century as a restaurant classic.
It became especially popular in Europe and the United States in the 1970s and 1980s, often served in upscale restaurants as a symbol of elegance. Today, it remains a beloved comfort food, bringing together European tradition, buttery indulgence, and crispy satisfaction.
Knowing this background adds to the experience—it’s not just dinner; it’s a dish with a story, one that has traveled across continents to find a place in modern kitchens.
Why You’ll Love This Chicken Kiev Recipe
There are countless reasons this dish has stood the test of time, but here are the highlights:
- A Surprise in Every Bite – The molten garlic butter core makes every slice exciting.
- Crispy on the Outside, Juicy Inside – Double-layer coating locks in moisture while giving a satisfying crunch.
- Versatile and Crowd-Pleasing – Works for family dinners, date nights, or entertaining guests.
- Customizable – From herbs in the butter to cooking methods (fried, baked, or air fried), it adapts to your preferences.
- Restaurant Quality at Home – With a little practice, you’ll serve a dish that looks and tastes gourmet.
Ingredients You’ll Need
To achieve the perfect Chicken Kiev, the right ingredients matter. Below is a detailed breakdown with suggested quantities (for 4 servings).
Chicken
- 4 large boneless, skinless chicken breasts (around 7–8 oz each)
Garlic Herb Butter
- ½ cup (1 stick) unsalted butter, softened
- 3 cloves fresh garlic, finely minced
- 2 tablespoons fresh parsley, chopped
- 1 tablespoon fresh dill or thyme (optional)
- 1 tablespoon lemon juice (freshly squeezed)
- ½ teaspoon salt
- ¼ teaspoon black pepper
Coating
- 1 cup all-purpose flour
- 2 large eggs, beaten
- 2 cups Panko breadcrumbs
- ½ teaspoon paprika (optional, for color)
- Salt and pepper to season
For Cooking & Serving
- 1½ cups neutral oil (light olive oil, canola, or sunflower)
- Fresh parsley leaves for garnish
- Lemon wedges for serving
Pro Tips Before You Begin
- Soften the Butter Properly – Let butter sit at room temperature until smooth; this makes mixing herbs easier.
- Seal the Chicken Pocket – Cut carefully to avoid piercing through, or the butter will leak out.
- Chill Before Frying – Resting the stuffed chicken in the fridge for 15–20 minutes helps it hold shape.
- Use a Wire Rack – After frying, place on a rack instead of paper towels to maintain crispiness.
- Cook at the Right Temperature – Oil should be around 350°F (175°C). Too hot and the breadcrumbs burn; too cool and the coating absorbs oil.
Step-by-Step Instructions
Step 1: Make the Garlic Herb Butter
In a bowl, mash together softened butter, garlic, parsley, dill, lemon juice, salt, and pepper until smooth. Shape the mixture into a log using plastic wrap, then freeze for 15 minutes. This makes it easier to stuff into chicken later.
Step 2: Prepare the Chicken
Using a sharp knife, slice a deep pocket into each chicken breast without cutting all the way through. Slide in a piece of chilled garlic butter. Press gently to seal and season the outside with salt and pepper.
Step 3: Bread the Chicken
Set up a breading station with three shallow bowls: flour, beaten eggs, and breadcrumbs. Dredge each chicken breast in flour, dip into eggs, then coat fully in breadcrumbs. For extra crispiness, repeat the egg and breadcrumb steps once more.
Step 4: Fry the Chicken Kiev
Heat oil in a large skillet over medium-high heat. When hot, carefully add chicken breasts. Fry for 3–4 minutes per side until golden brown. Transfer to a baking sheet and finish in a preheated oven at 375°F (190°C) for 12–15 minutes, until internal temperature reaches 165°F.
Step 5: Serve
Rest for 5 minutes before serving. Garnish with parsley and lemon wedges. Slice carefully—watch the buttery sauce spill out!
What to Serve with Chicken Kiev
Pairing is everything. Here are some delicious sides and drinks that complement the richness:
- Classic Sides: Mashed potatoes, creamy polenta, or buttered noodles.
- Vegetables: Steamed asparagus, roasted Brussels sprouts, or green beans almondine.
- Salads: Arugula salad with vinaigrette, cucumber dill salad, or tomato mozzarella.
- Sauces: Mushroom cream sauce, light Dijon mustard sauce, or herbed yogurt dip.
- Drinks: A chilled Sauvignon Blanc, Chardonnay, or sparkling lemonade for non-alcoholic pairing.
Variations & Substitutions
- Herb Variations – Try basil, chives, or tarragon in the butter.
- Spicy Twist – Add chili flakes or cayenne for a kick.
- Air Fryer Method – Cook at 375°F for 20 minutes, spraying well with oil for crispiness.
- Baked Version – Bake at 400°F for 25–30 minutes for a lighter option.
- Meat Alternatives – Use turkey breasts or even fish fillets for a unique twist.
- Vegetarian Spin – Replace chicken with thick zucchini slices or portobello mushrooms stuffed with garlic butter.
Nutritional Information (per serving, approx.)
- Calories: 540
- Protein: 42g
- Fat: 30g
- Carbohydrates: 22g
- Fiber: 2g
- Sodium: 480mg
(Values may vary based on exact ingredients and cooking method.)
Storage & Leftovers
- Refrigeration: Store in an airtight container for up to 3 days.
- Freezing (Uncooked): Freeze breaded but uncooked chicken for up to 2 months. Cook directly from frozen, adding extra time.
- Reheating: Best reheated in oven or air fryer at 350°F until warmed through. Avoid microwaving—it softens the crust.
FAQs – Answering Common Questions
Q: Can I prepare Chicken Kiev in advance?
Yes. You can assemble and bread the chicken a few hours before cooking. Keep it refrigerated until ready to fry.
Q: Why does my butter leak out?
It usually happens if the pocket wasn’t sealed properly or the butter wasn’t chilled enough. Freezing the butter log helps.
Q: Can I bake instead of frying?
Yes, bake at 400°F for 25–30 minutes, but the crust may be slightly less crispy.
Q: Can I make it in the air fryer?
Yes. Spray generously with oil and cook at 375°F for 20 minutes.
Q: Do I need Panko breadcrumbs?
Regular breadcrumbs work, but Panko provides the lightest, crispiest crust.
Q: Is lemon juice necessary?
Not essential, but it balances the richness beautifully.
Final Thoughts
Chicken Kiev isn’t just another chicken recipe—it’s a culinary experience. From the crispy breadcrumb shell to the burst of garlic butter inside, every bite feels indulgent. What makes it even more special is that you can create it in your own kitchen with everyday ingredients and a few simple techniques.
Once you master it, you’ll see why this dish became a restaurant classic. Whether you serve it for a cozy family dinner or to impress guests at a celebration, Chicken Kiev delivers flavor, drama, and satisfaction in one golden package.
So go ahead—roll up your sleeves, prepare that garlic butter, and make this timeless dish part of your cooking repertoire. Your first bite will tell you why it’s worth mastering.